


.jpg)
You will love this kitchen table redo! It was almost 5 years ago from today that Paul surprised me to go on a quick weekend vacation to visit New York City. I was due to have Jackson in April and it was Paul’s “busy season” with public accounting. We were running around the city, eating pizza, and squeezing three broadway shows into a two day time period.
I still remember we were in a “tix” booth trying to grab a great last minute deal when I got this phone call from Janae, “Camille, I found this amazing table and hutch that you will love! It is only $400 for both!” Trusting her judgment I told her to go for it and I would pay her back. I can’t remember the details, but needless to say this table has been great for our family so far. It can seat up to eight people and has three leaves that can fit to make it even longer.
This table has since been moved 4 times, and not once have I painted it although it has had a fair share of new scrapes and dings.
But I am ready to tackle this project and was looking for some inspiration. Unfortunately when I sanded everything down I came to realize that what lay underneath was not actually real wood, but more of a composite wood. Which I was confused because this was a basset table with sturdy wood chairs…but oh well.
My style these days is lighter, more beachy/light (wishing I lived by the ocean.) I like the brown how it was but wanted to change things up a little to make it look a little more like “driftwood”??
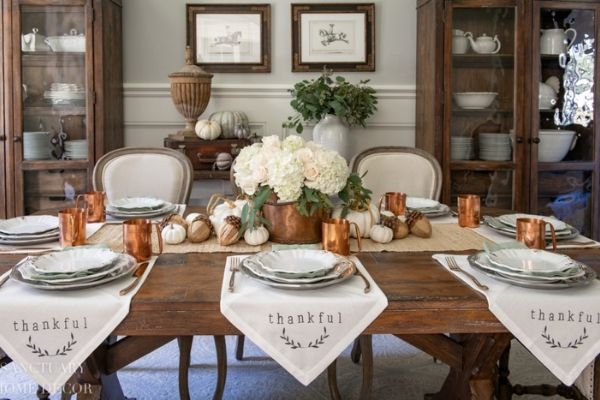
Something like this:


I love this natural table look from purehome.com

So then came the sanding people. This was my “I’m posing with my sander look” and then I thought, let’s do this for real. I went and plugged it in so Paul could take a picture of me actually sanding and little did I know it was on and no one was there to hold it. It zipped right across that table and landed on the floor flipping around like a fish out of water….not good. And a piece of it broke.
Sad face.

Luckily, this guy stepped in to save the day and got the real work started. With a little super glue and elbow grease we were on our way.

If you are crazy like me and decide to do this indoors in the middle of winter, because it is in the single digits outside, remember to vacuum as you go. Get a little helper involved with the promise of a treat or something like that.

After just a little more sanding this baby is ready to go! We went to home depot and scored a gallon of grey paint/primer for only $7 in their “woops” section. I am planning to do a base of grey and then a “dry brush” technique.
For step one you will need:
sander
sand paper (high grit)
patience
Step two you will need:
paint
glaze/lighter color for texture. When doing a white wash/grey wash you mix 2 parts paint to 1 part water. I am going to be experimenting with this today and seeing how this goes.
paint brush
thin, small roller
sealer:wax, or polyacyrilic
Wish me luck…part two is today. That is if I can find my paint brush! 🙂

Hello! I am Camille, a wife, mother of four, Disney obsessed, certified teacher, and believer in creating your best momlife the way you see fit. Motherhood comes with its ups and downs, my hope is you’ll find something here to make your life a little better/easier. Let’s be friends on social!


Wow Camille! Way to do it yourself! It’s going to be beautiful and I can’t wait to see the finished product!
This is absolutely stunning! And I couldn’t have found it at a better time…..I have just stripped down my kitchen table and am going to do this finish on it.
I did have some questions though…did you paint it all gray first, then whitewash, then glaze?
Also…..was the whitewash white paint and water or gray paint and water.
Again, thanks so much. I had no idea what to do with this table as once stripped I realized it wouldn’t be able to be stained due to permanent markings in the wood. Now you made the fact it would have to be painted exciting!
Yeah! I am glad you like it! To answer your questions 1. Yes, I did paint the whole table grey first, white washed second, glazed last and then put on the protective coat.
The white wash was made of watered down white paint. Hope this helps! I’d love to see a before and after shot of your project! Follow mymommystyle on Instagram/Pinterest/Facebook (not sure what you prefer) and tag us!
Have fun~ Camille
Thanks so much. I will try to get the before and after pictures up somewhere. I am not very 21st century but I do have facebook….just haven’t been on it in months and certainly not enough to know how to put pics up!!! I will try and figure it out!
I did have one other question and then I’ll try not to fill up the whole cmments section with my nervous nellie questions!……Was the grey light, medium, or dark in shade? I am also thinking of doing this in a taupe type of color but am still undecided……what is your opinion of that color option for this style of finish?
Thanks so very much again!
I was lucky enough to find a gray that I liked we’ll enough in the “oops” section of already made paint which cut on the cost. It was a medium gray. If you want to make it lighter you can always make your white wash thicker with another coat.
Taupe would be really pretty too! I already had a lot of cream in my kitchen so I wanted something a little different. I am painting my chairs white but haven’t gotten to it yet. (Pregnancy has slowed down my painting lately.)
Good luck!
camille I love your table and we are redoing our kitchen and my husband ask me what was I going to do with our ugly table so I’m coping you my only question is did you use high gloss or flat paint I really did love the look thanks
I want to say it was somewhere in between. Honestly, it doesn’t matter much because one you do the top coat and the protective coat you can choose the finish you would like. I would suggest leaning more towards gloss because it is easier to clean!